Step 4: Create Submission File
Before producing the IRS TAX file for submission, ensure that all ProForm orders have been exported to Pro1099. The only orders that will be exported are purchase orders that contain a seller, have a settlement date prior to or equal to today's date, and are not canceled, duplicate, or hold status, and which do not have the Exclude order from IRS submission checkbox checked.
- Replacement Files: If you receive notification from the IRS that you need to submit a replacement file, create and submit the file in the exact same manner that you created the original file. Follow these steps to create all submissions:
Create your file (IRSTAX). When prompted to save, save to your desktop.
- Open the IRS Submission File Wizard: Select the Pro1099 tab and click the Create Submission File button:
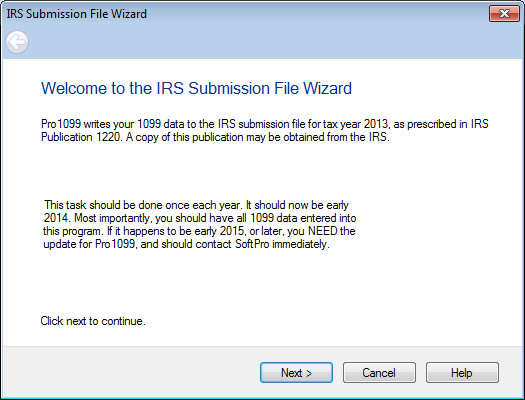
- Welcome: Confirm that your Pro1099 software has been updated with the current Tax Year. The Welcome screen provides a summary of why and how often a file needs to be submitted. If you need an update, please contact SoftPro. If you only have one TCC code it defaults to your TCC code in the TCC code field. If you have multiple TCC codes, you are required to enter a TCC code before continuing to the next step. Click Next.
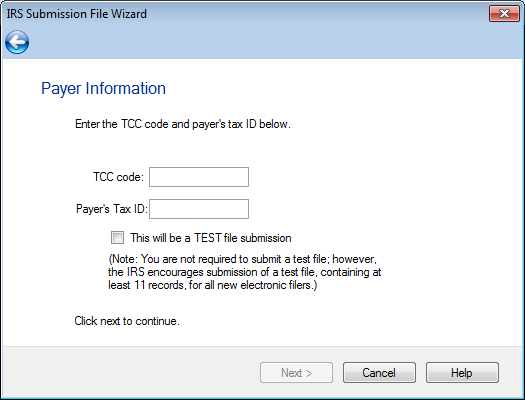
- Payer Information: Enter the Tax ID in the Payer's Tax ID field. If you have multiple Tax ID numbers for a single TCC code, you may leave this field blank & your file will include "A" & "B" records for each Tax ID number associated with the TCC code entered. If you’d like to submit separate files for each Tax ID, you will need to enter the Tax ID number before continuing to the next step. Check the This is a TEST file submission box if you are submitting a test file. This is not required but is suggested for first-time filers. A test file should include at least 11 records. Click Next.
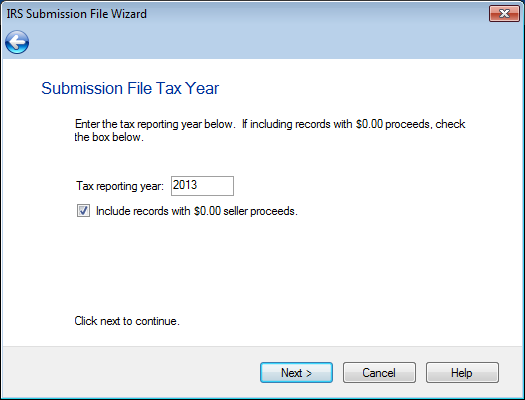
- Submission File Tax Year: Enter the tax reporting year. The year defaults to the current year; you can’t enter a future year. Check Include records with $0.00 seller proceeds to include records in the file that have $0.00 gross proceeds & the Property or services received checkbox is not selected. Click Next.
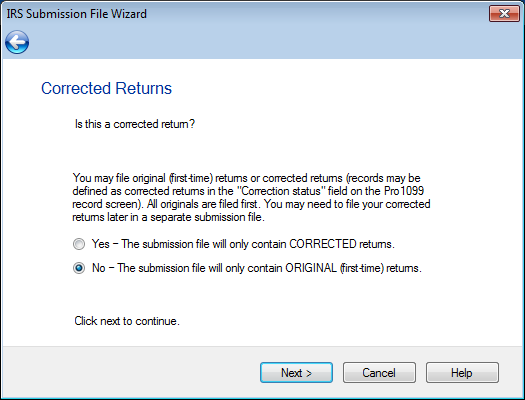
- Corrected Returns: You can create a corrected return by selecting the Yes option. Click No if this is an initial submission and not a corrected return. A correction is an information return submitted by the transmitter to correct an information return that was previously submitted to and processed by IRS / ECC-MTB but contained erroneous information. Corrections should only be made to records that have been submitted incorrectly, not the entire file. Click Next.
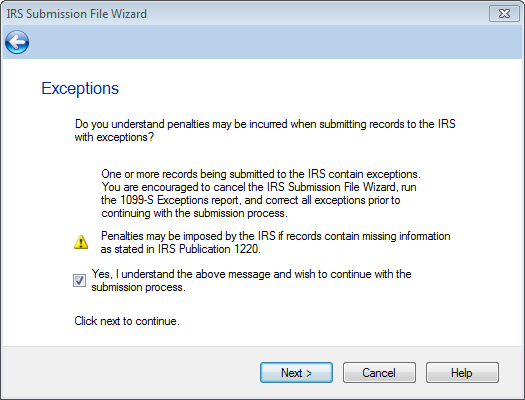
- Exceptions: If you’re submitting an IRS Submission file with error (not recommended), then you’ll see the screen below. You can generate an IRS submission regardless of 1099 record exceptions. You are encouraged to cancel the wizard, verify, & correct all exceptions (by running an Exceptions Report) before continuing with the submission. Click Cancel to exit the wizard without creating a submission file, or check Yes, I understand the above message…; click Next to continue.
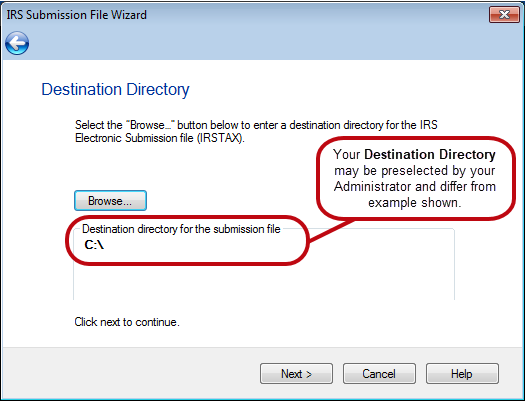
- Selecting the Destination Directory
- Click the Browse button to browse out to the folder where you intend to save the file.
- Click Next to continue.

NOTE: The destination folder is shown in the Destination directory for the submission file section and may be designated (or locked) by your Administrator. If that is the case, skip to step 2.
- NOTE: You must retain the IRSTAX file you send to the IRS for three years. This text file can be opened in Notepad and reviewed for research in the event of an audit or a returned submission. However, it is important to keep in mind that Pro1099 will always output a file with the same name, IRSTAX, which could create problems if not named carefully. To avoid sending an incorrect version of the file to the IRS—as well as to prevent overwriting the previous year’s file, there are a few steps that can be taken:
- Identify where you want to save the IRSTAX file BEFORE creating it in Pro1099. (e.g., “Desktop”)
- Ensure that the folder or desktop location does not already contain a file called IRSTAX.
- If there is an existing/older copy of an IRSTAX file, simply rename it. (e.g., “IRSTAX2011”)
- AFTER submitting the new file, rename the file to something different. (e.g., “IRSTAX2012”)
- You may name this output file whatever you wish, and submit that file. For example, you may rename “IRSTAX” to “FIREsubmission2013” and then submit to the IRS.
- Confirmation
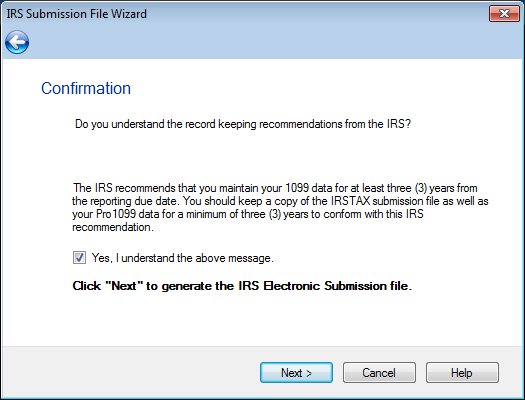
- Select Yes, I understand the above message if you understand the IRS's recommendations, and to generate the file. Click Next.
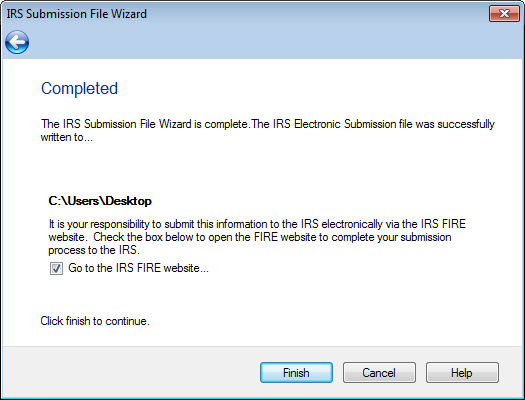
- Completed: This indicates your file has been generated and saved to the location designated above.
- Check the Go to the IRS FIRE Website check box and click Finish to connect to the IRS FIRE system via an Internet browser.
