SoftPro Select 4.1 (4.1.40401.8) - 4/16/2016 - Part 1 of 4
Summary of Changes
Documents
- A new document bundle installer allows for easier document management and installation to take place while users are actively working.
- A My favorites option has been added to the ProForm documents tree.
- Documents & reports may now be rendered through the API.
- Documents may now be hidden from the document tree if they’re not applicable to a selected order.
Title
- The user may now overlay exceptions and subordinate matters from another order or template’s policy, not just requirements and exceptions from another order or template’s commitment.
- Multi-select has been added to requirement/exception overlay screen.
- Lien release recording information fields have been added to the Existing Liens screen.
- A fee type field has been added to the Additional Title Charges screen.
- The CDF fee type is now defaulted when sending from the Premiums & Endorsements screens.
- Calculating & entering title premiums has been improved on the Title Insurance Premium screen and related screens; final premium amounts are now sent to the payee/payor grids & registers.
- Charges may now be sent from the Additional Title Charges screen to HUD lines 1101-1108.
Closing Disclosure Form & Settlement Statements
- Final premiums can now be shown in the debit columns on the settlement statements, and a new Disclosures Dialog has been added to allow the user to edit these amounts.
- The final premium amounts and splits are now sent to the payee/payor grids and registers.
- An Other amount field has been added to the percent charge.
- The seller pay % has been enabled in templates to allow percent charges with commissions.
- Fee types have been added to each row in the Section E fee schedule grids.
- The first column of the Projected Payments section now allows the user to enter both Minimum and Maximum payments.
- A CDF checkbox option was added to show/hide amounts of additional disbursements from broker’s commissions on document.
Technical Requirements
- .NET Framework 4.6.1: SoftPro Select 4.1 requires the .NET Framework 4.6.1, and will include it during the installation process.
- Supported Operating Systems:
- Server: 2012 R2, 2012, 2008 R2 SP1
- Client: Win 10, Win 8.1/8, Win 7 SP1
- Unsupported Operating Systems:
- Server: 2008 SP2, 2003 SP2
- Client: Win 7, Vista, XP
- Note: This version of the .NET Framework is not supported with Exchange 2013. For more information, read this article at Microsoft.com.
- Supported Operating Systems:
- Integrations:
- SoftPro Select v4.1 contains major enhancements and API changes. Customers with integrations will need to rebuild their integrations against v4.1 in the same manner as with prior releases that had a major or minor version number change.
- NOTE: It will be necessary to target and recompile external code against .NET framework 4.6—NOT 4.6.1.
- The Select SDK now requires Visual Studio 2015.
- Database: Changes have been made to the CDF forms and Settlement Statements.
- If you have any custom versions of these forms, they will require upgrade by the custom reports team.
- SQL Server 2005 is no longer supported.
Documents
- Select now has a bundle manager in SPAdmin to aid in document installation.
- Users have been given new options for accessing document favorites.
Bundles
The new Bundle installer allows administrators to install and uninstall document updates at any time, including while users are in the application; there is no need to have the users exit before updating. Bundle files (.bnd) may contain ReadyDocs, ReadyBlocs, reports, tree definitions, & custom fields. 197877
Bundle Manager
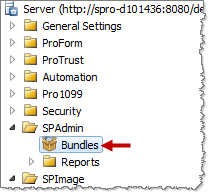
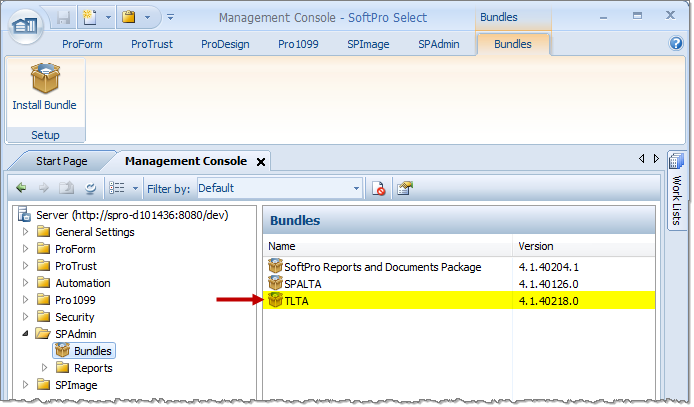
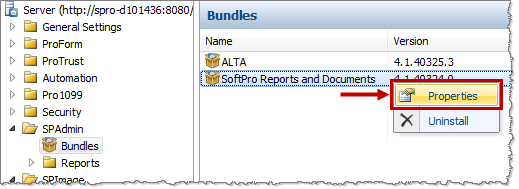
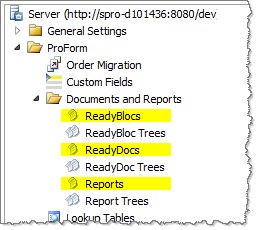
Viewing, Installing, & Uninstalling document bundles is now handled underneath the SPAdmin folder:
Bundle Installation Wizard
The application will walk you through the import process. With the appropriate permissions, an administrator can install or uninstall documents while users are still logged in to Select:
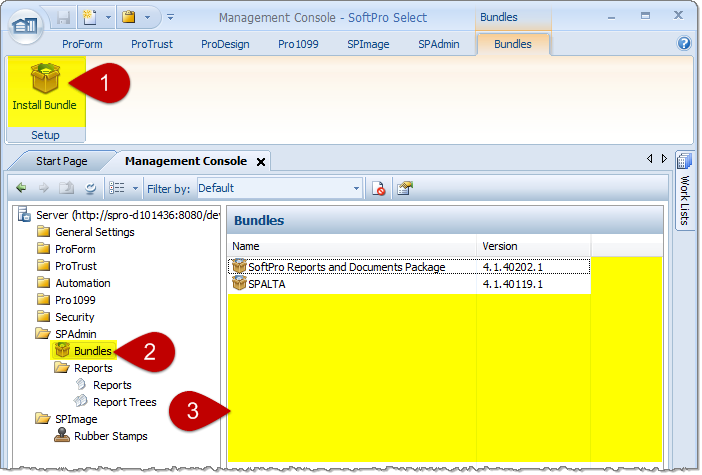
To launch the wizard, complete one of the following actions:
- Click the Install Bundle in the ribbon,
- Right click the icon in the tree, or
- Right click in the white space in the Bundles pane.
Installing a new bundle only requires a few clicks:
- The first screen is a welcome screen. Click Next:
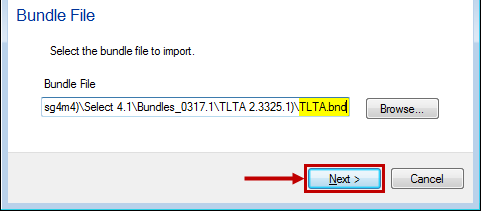
- The second screen allows you to browse and confirm the .bnd bundle file that you wish to install. After selecting a .bnd, click Next:
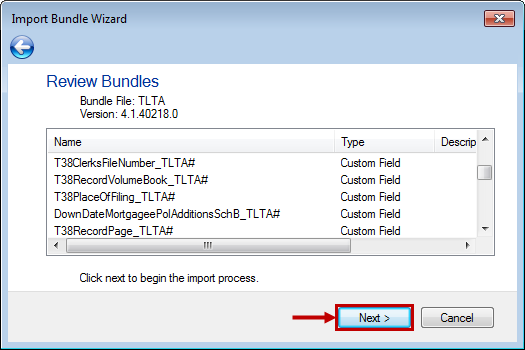
- The wizard scans the bundle & allows you to review the package details. Click Next when ready:
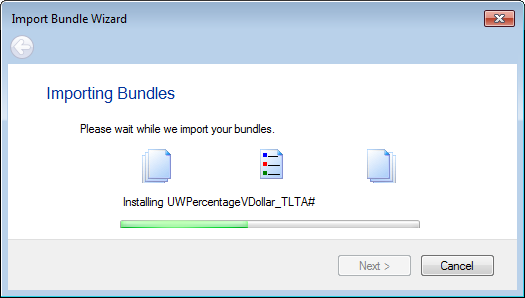
- The import process will proceed automatically:
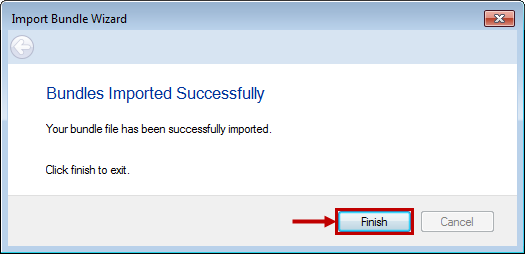
- You will receive a message that the package was installed successfully. Click Finish:
- You can view the newly-installed bundle in the Bundles Pane at right. You may double click on the bundle name and open up the bundle properties dialog:

Bundle Uninstallation
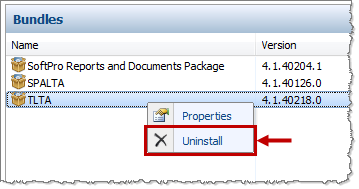
Uninstalling bundles may only be done by right-clicking a bundle in the Bundles Pane and selecting Uninstall. You will be prompted to confirm and then the program will delete the bundle:
- Users are able to continue working with documents that are being uninstalled by an administrator—if the document(s) are open when the uninstallation begins—but once they close the document(s), the documents will disappear and be unavailable.
Bundle Properties
The properties of a given bundle may be viewed by double-clicking or by right-clicking and choosing the Properties option from the context menu:
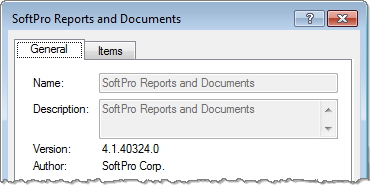
- This will present a dialog for that bundle which contains General & Items tabs:
- General Tab: View the bundle’s name, description, version, & author.
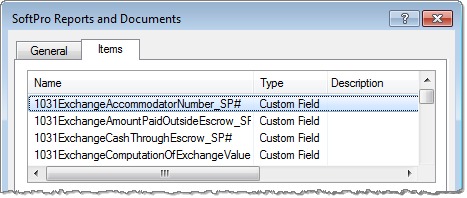
- Items: View all bundle contents by name, type (Custom Fields, ReadyBlocs, ReadyDocs, et cetera), & description.
Bundle Permissions
Three new permissions have been added to SPAdmin > Bundles:
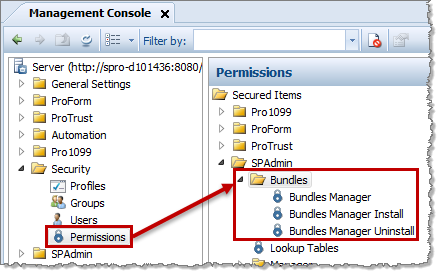
- Bundles manager: If this permission is granted, the user can view the Bundles Manager.
- Bundles manager install: If this permission is granted, the user can install bundles. The user also needs Bundles Manager permission to take this action.
- Bundles manager uninstall: If this permission is granted, the user can uninstall bundles. The user also needs Bundles Manager permission to take this action.
Versions
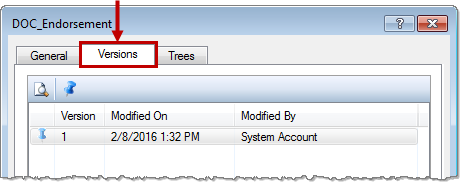
ReadyBlocs, ReadyDocs, and Reports now have a Versions tab available in their properties view.
When accessing the properties for one of these document types, the user will see the new versions tab in the center of the dialog. For example, here’s the tab as it appears on an endorsement ReadyDoc:
- Preview
 : This button will open Microsoft Word and allow the user to view the document that is selected in the list. A document may be revised in preview mode and saved as a new document, but it will have to be imported into the documents folder before it can be used.
 - Pin/Unpin
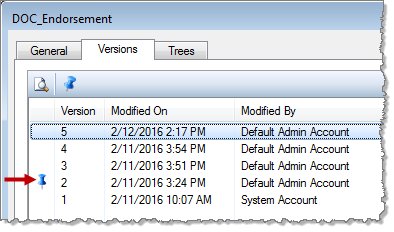
 : This button allows the user to specify which version is being used in ProForm.
- The pinned document will always be used, even when another bundle is imported.
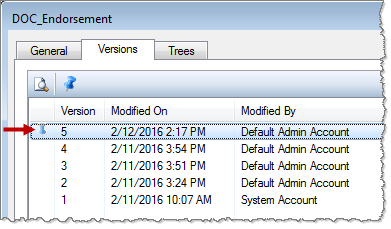
- By default, the most recent version is selected.
- A user may pin an earlier version should they need to do so. This document version will become the version active in the application:
- Version column: Lists versions of the document that have been created.
- Modified On column: Shows the date and time that a document was changed.
- Modified By column: Lists the name of the user who changed a particular version.
Visibility Conditions
With this release, the user has an option to change the visibility of individual ReadyDocs and ReadyDoc tree folders with Python code. Code can be added and manipulated here to determine whether or not users see the corresponding documents & folders on the Documents screen in ProForm. 89401
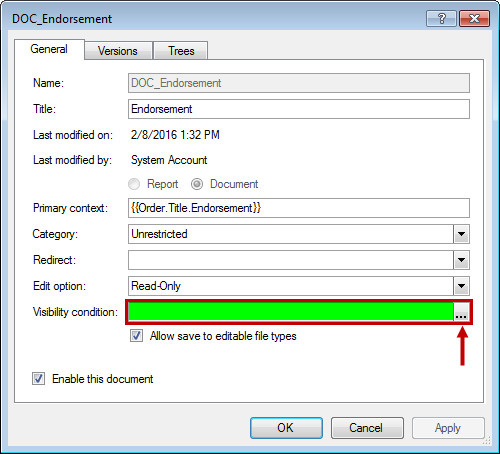
- ReadyDoc Properties: One of the final fields on this tab is the new visibility conditions option.
- Typing or pasting directly into this field will not change the condition here. In order to create and edit Python code, you must use the expression editor, accessible through the ellipses button.
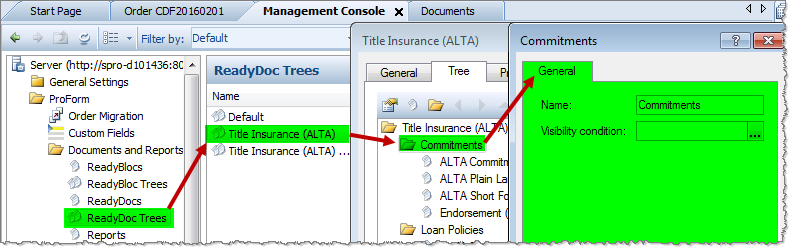
- ReadyDoc Tree folder properties: Opening a tree, then a tree tab, then viewing the properties on a folder will allow for editing the folder name and provide access to the expression editor:
- Typing or pasting directly into this field will not change the condition here. In order to create and edit Python code, you must use the expression editor, accessible through the ellipses button.
Expression Editor
This editor accepts expressions in simplified Python language:
- Formulas may be copied and pasted into this scrollable text editor.
- Do not capitalize Python Keywords (i.e. return, if, else, and, or, is, in).
- Capitalization is required when using either True or False.
- Use capital letters when typing field codes as they appear in the Field code Browser (i.e. Order.TransactionType).
- Correct indentation is required.
- Note: Python is a standard scripting language and many free tutorials are available online. For SoftPro-specific questions about Python conditions, please refer to SoftPro’s developer forum www.softprocorp.com/devforum.
Sample Expressions:
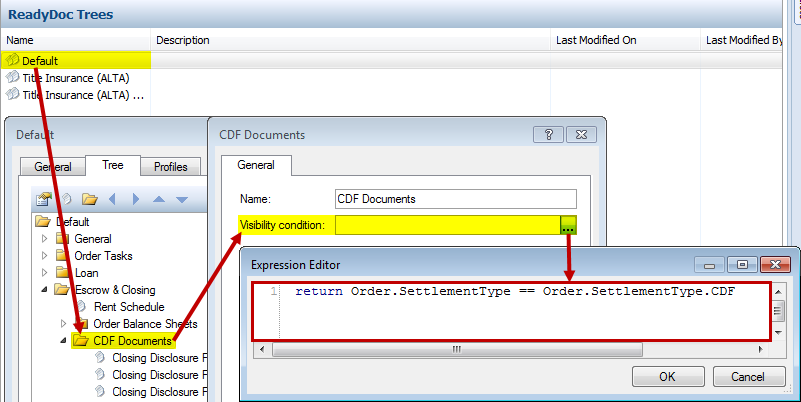
- Default/Escrow & Closing/CDF Documents: If the settlement type of the order is CDF, the CDF Documents will display:
- return Order.SettlementType == Order.SettlementType.CDF
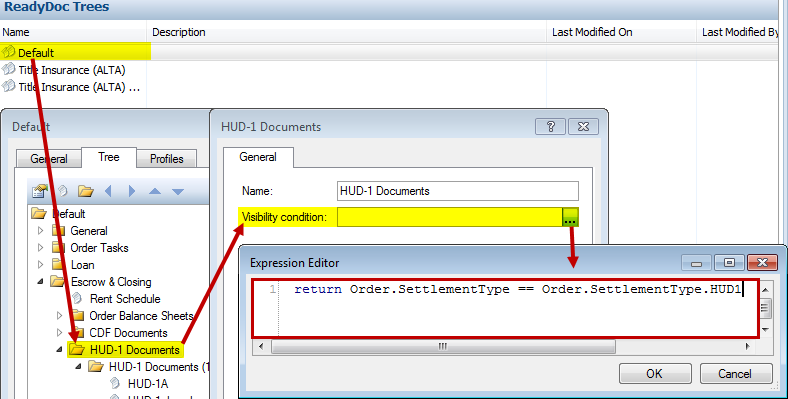
- Default/Escrow & Closing/HUD-1 Documents: If the settlement type of the order is HUD-1, the HUD-1 Documents will display:
- return Order.SettlementType == Order.SettlementType.HUD1
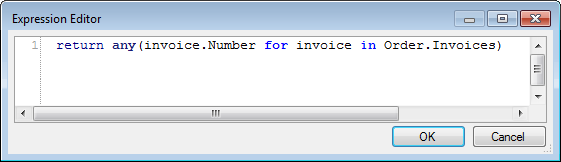
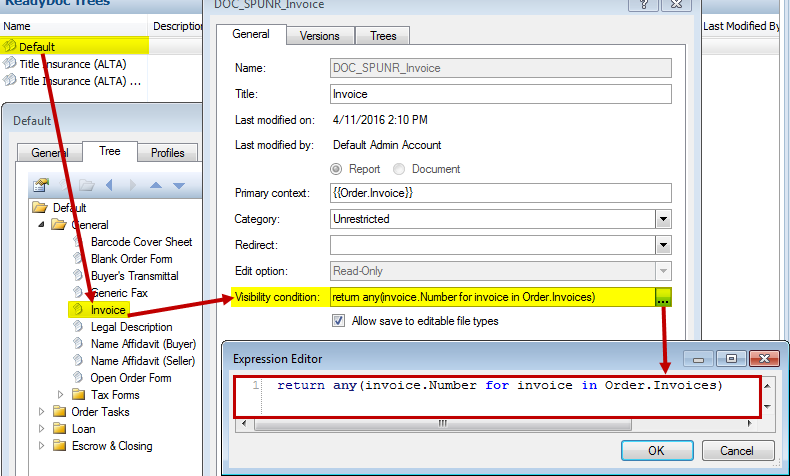
- Default/General/Invoice: Will display the Invoice doc IF an invoice exists on the order.
- return any(invoice.Number for invoice in Order.Invoices)
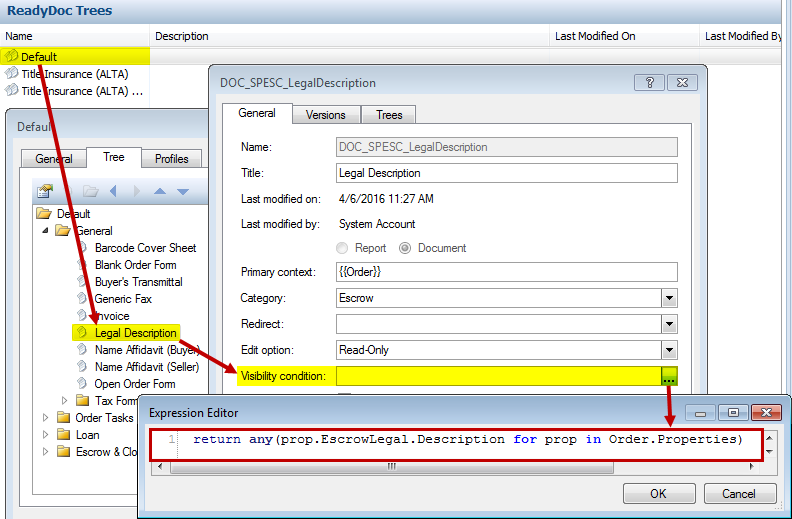
- Default/General/Legal Description: The Legal Description document will display IF a legal description for any property has been entered in the order.
- return any(prop.EscrowLegal.Description for prop in Order.Properties)
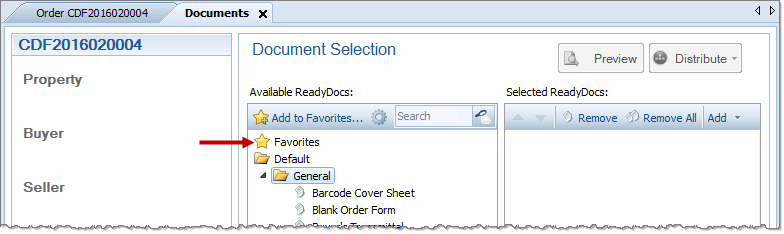
Document Favorites
Users can now create and maintain a folder containing their favorite/frequently-accessed documents. This option has been added to the Documents screen: 27343
Several items to note regarding Favorites:
- It is managed by individual users.
- Users may add new folders and documents and organize however they wish.
- Users are free to rename folders and documents.
- These custom names will only appear in an individual user’s favorites; users cannot rename documents or folders for everyone else.
- Favorites are saved in the user’s remote profile and can therefore be deleted with system changes. If this happens, they will have to be recreated by the user in Select.
- The Search bar
 will search the favorites folder & all other documents visible to the user.
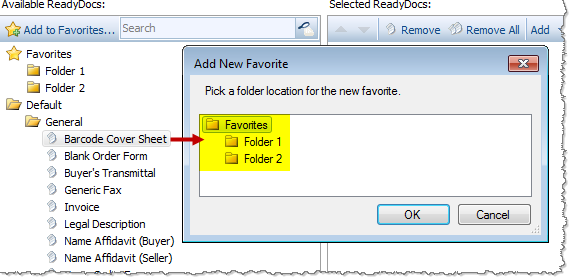
Add to Favorites
- The user may add documents or folders with the Add to Favorites button
 .
.- Users may also drag & drop documents or entire folders from the tree into their favorites area.
- Only one document or folder may be added at a time; the user will have to specify where in their favorites they wish to save the new item:
- If a folder is selected & added, it will be added along with all the documents it contains.
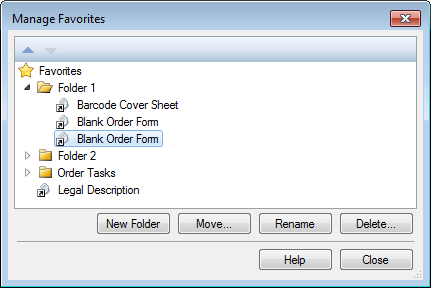
Manage Favorites
- Users may organize, rename, or delete items by using the Manage Favorites button
 :
: - Folders and documents may be moved by using the arrows at the top of the dialog, dragging and dropping them in different areas, or by using the move button.
- Folders and documents may be deleted and renamed via the buttons at the bottom of the dialog or by right-clicking.
Other Changes
- Extremely long legal descriptions were not rendering correctly as attachments; resolved. 261120
- Spacing issues were occurring on documents with prompts after retrieving requirements or exceptions containing formatted text. 290193