SoftPro 4.0.3 (4.0.30302.44) - 5/29/2015
This release includes a number of new features:
- Document annotation: Users now have the option to annotate .pdf files from the Attachments screen. This includes adding highlighting, notes, shapes, text, bookmarks, “rubber stamps,” and more. The annotation option is available for any .pdf saved in order attachments.
- Document merge: A new functionality has been added which enables the user to take a .pdf from the attachments area of an order or from a location on their computer and then merge it into the Selected ReadyDocs area of the Documents tab. Example use: Add the map when creating the commitment so you can publish or email them as one combined .pdf.
- Order unlock request: A feature has been added that allows one user to request access to an order that is open on another user’s machine.
- Memory usage optimization: Functionality has been added to help detect & fix memory leaks.
- Lookup table cascade: A feature has been added to suppress cascading lookups. Example use: Check “Suppress Cascading” on the Lender lookup table’s City column so that selecting a lender will not trigger a City lookup, which could result in a prompt to the user if duplicate entries exist for the lender’s city.
Users now have the option to annotate .pdf files from the Attachments screen. This includes adding highlighting, notes, shapes, text, bookmarks, “rubber stamps,” and more. The annotation option is available for any .pdf saved in order attachments, whether it originated from Select’s ReadyDocs or another source. 56242
The document annotation option is available with an SPImage license.
Permissions have been added:
· SPAdmin > Security > Permissions > SPAdmin > Managers > Rubber Stamps Manager:
o Used to assign the SPAdmin rubber stamp creation and editing right to users or groups. If not granted, the stamp manager will be disabled & users with permission to access SPAdmin will be able to view but not edit the data.
· SPAdmin > Security > Permissions > ProForm > Order > ReadyDocs > Annotate Attachments:
o Used to assign the annotation right to users or groups. If this permission is granted, the user can access all the attachment annotation tools. If not granted, the Annotate button in the Attachments toolbar and the Annotate option in the Attachment right-click/context menu will be disabled.
Accessing The Annotation Screen
To open a .pdf and annotate, the user may:
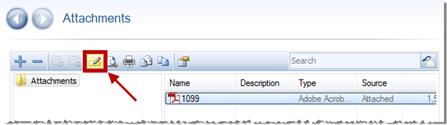
· Select a .pdf in the attachments list and click the annotate icon in the toolbar:
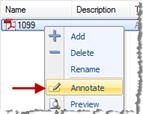
· Right click on a .pdf in the attachments list and click the annotate icon in the context menu:
· Multiple documents can be opened and annotated simultaneously, but they must be opened one-at-a-time and they will each open in separate tabs.
The annotation screen can display one .pdf at a time. Annotation tools and navigation options are located on the top, left, and bottom of the screen. All annotations may be formatted and customized to some extent. Descriptions below:
- Adding Annotations:
- Add a single annotation: Each of the tools described below can be activated and used by clicking one of the toolbar buttons.
- Add multiple annotations: Add multiple, consecutive annotations (of the same annotation type) by pressing & holding the Shift key & clicking one of the annotation tool buttons. The tool will remain "on" while you apply multiple annotations. Turn the tool off by pressing the annotation tool button once more.
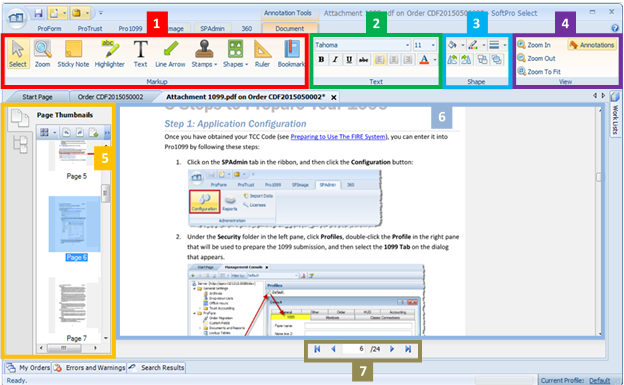
1. Markup:
o Select tool: Allows the user to select the document and annotations:
§ Document navigation: the select tool will display as a hand icon when hovering over the document, and allow the user to “grab” and move the selected page around on screen.
§ Text selection: This tool changes into a text cursor when hovering over text and allows for the selection and copying of text.
§ Annotation selection: the select tool will display with various arrow cursors when hovering over a selected annotation. Right clicking on an annotation and selecting the Properties option will display details on who added the annotation and when. Additionally, The cursors allow the user:
- Stretch/resize an annotation by hovering over the blue dots on the perimeter of the shape:

- Rotate an annotation by hovering over the center dot

- Move an annotation around on the page by hovering over an open area of an annotation

o Zoom: when this tool is selected, the user may click & drag to select an area of the page and zoom in on that area. Zooming back out can be done via the view options.
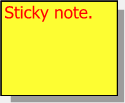
o Sticky Note: allows the user to insert a note; customizable text, color, and size.
o Highlighter: inserts a transparent, colored square block of highlighting; color may be adjusted.
o Text: A text box may be inserted; background color and text formatting may be altered. The default text setting box has no background color. May be rotated and resized.

o Line Arrow: Inserts an arrow; size, color, and location may be customized.

o Stamps: stamps configured in the Rubber Stamps manager in SPAdmin will display in this drop-down:
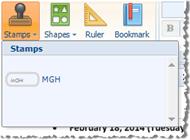
§ When a stamp is selected, the stamp will be inserted on the page being viewed:
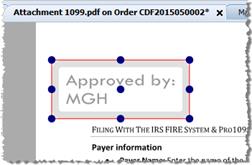
- The stamp may be scaled, rotated, and moved, just like other annotations.
- The font may be adjusted with the text options.
- Shape options are available as well.
- The stamp text may only be edited in SPAdmin.
§ Stamps may also be inserted with the CTRL+ALT+S “Quick Stamp” shortcut:
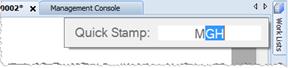
- The user must type the stamp code in to pull up existing stamps in the quick stamp field.
- The user can use the up or down arrow keys to scroll though available stamps which have a code starting with the same letter(s).
o Shapes: The user may insert several different shape annotations.
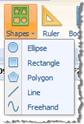
§ Ellipse/Rectangle: click on the document, hold the mouse button down, drag to the desired size and shape, and release the mouse button.
§ Polygon: To add a polygon, click on the document to set a starting point, then click again once for each additional corner. To complete your polygon, double-click the final corner.
§ Line: to draw a line, click where you want the line to begin, and holding the mouse button down, move the mouse to the desired end point. Release the mouse button.
§ Freehand: Use this tool to draw a freeform line on the document.
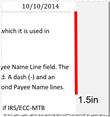
o Ruler: This option draws a straight line and simultaneously displays a measurement in inches. Color and line width may be adjusted, but font size may not be changed.
o Bookmark: The bookmark tool allows for the insertion of one bookmark per page. If a bookmark already exists on a particular page, the button won’t be available. Clicking the icon pulls up a New Bookmark dialog:
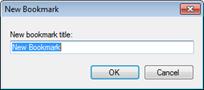
§ For details on how to navigate and edit bookmarks, see the navigation information below.
§ Added bookmarks will display in the Page Bookmarks pane.
§ Adobe Reader will also show these bookmarks in its bookmarks list.
2. Text: Font, font size, basic formatting (Bold, italic, underline, strikethrough), alignment, and color may be specified when a text annotation is selected.
3. Shape: Fill color, outline color, and line width may be specified when a shape OR text annotation is selected. Additionally, the user may:
o Rotate an annotation left/right  : These buttons rotate shape in 90-degree increments around a center point.
o Send an annotation to the back/front  : These two buttons will move an annotation from the back to the front or vice versa; although the .pdf document itself always remains as the bottommost layer.
4. View: Use these buttons to zoom in/out on the open document.
o The Annotations button “hides” and “displays” all of the annotations applied to the document but does not delete them.
5. Page navigation panel: The left side of the annotation screen contains Page Thumbnail & Page Bookmark tabs:
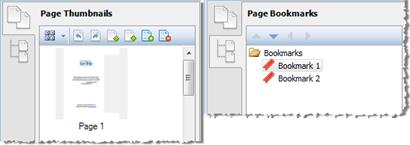
o Page thumbnails: One image will be shown for each page in the document.
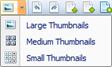
§ An option to view large, medium, or small thumbnails can be specified.
§ Two rotate buttons  allow the user to rotate a selected page 90-degrees to the left or right.
§ Two move buttons  allow for the user to move a selected page up or down in the page order.
§ The Insert and Delete buttons  allow the user to:
- Select other .pdf documents from their computer and insert them in their entirety into the document being annotated, and
- Delete individual selected pages
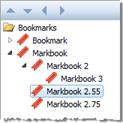
§ Once added via the bookmark tool, bookmarks will be visible in the navigation panel on the left; they may clicked to navigate through the document.
§ Bookmarks may be reordered and indented by using the arrow buttons at the top of the pane.
§ To rename a bookmark, right-click the bookmark and click Rename.
§ To delete a bookmark, right-click the bookmark & choose the Delete option or select a bookmark and press the Delete key.
§ Bookmarks added here will be displayed within Adobe Reader’s bookmarks list.
6. Preview Pane: displays the .pdf under review, as well as any included annotations. With appropriate permissions, the user may also add and edit annotations.
7. Page navigation buttons: The bottom of the screen contains buttons for navigating through pages; the user may input a number manually and press Enter to skip to a specific page:

Saving annotations does not save the rest of the order; the user will need to save while in the annotations tab as well as while in the order tab in order to ensure that everything is captured.
Searching a .pdf in while in annotate mode can be done two ways; the search function does not apply to text in annotations (I.e.-text boxes, sticky notes, etc):
· The CTRL+ALT+F shortcut allows the user to search the entire document by pulling up a find field. Pressing the Enter key will jump the user from one instance of the search term to the next.
· Right click and select find from the context menu; the find field will appear. Pressing the Enter key will jump the user from one instance of the search term to the next.
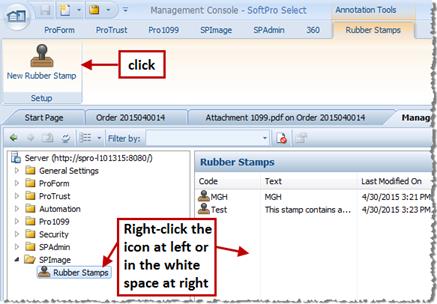
Rubber stamps may be added, edited, and deleted in SPAdmin under the SPImage folder.
To create a new rubber stamp:
· Click the New Rubber Stamp icon at the top of the screen.
· Right click the Rubber Stamps node in the SPImage folder.
· Right click in the white space in the Rubber Stamps frame.
To delete a rubber stamp, the user may select a stamp and press the Delete key, or right click on a stamp and select the Delete option for the context menu.
To edit a rubber stamp:
After opening a stamp, the user will encounter a dialog with three tabs:
· General:
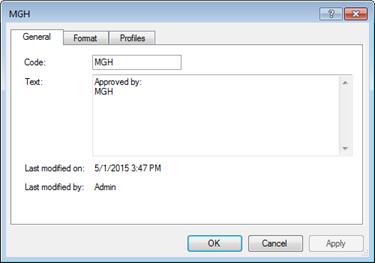
o Code: choose a brief code to use as the title for the stamp.
o Text: input the actual text content of the stamp itself. If multiple lines of text are needed, use the enter key to add line breaks in this text field.
§ Six keywords may be included by the user when configuring the stamp. These items will be inserted automatically when the stamp is applied:
- %user_name%: Username of the user who applied the stamp.
- %user_fullname%: Full name of user who applied the stamp.
- %user_initials%: Initials of the user who applied the stamp.
- %date%: System date when the stamp is applied.
- %datetime%: System date/time (in client machine’s time zone) when the stamp is applied.
- %time%: System time (in client machine’s time zone) when the stamp is applied.
§ After the stamp is applied, the replaced text will not change if other users open the document to view or annotate it. The text is “stuck” as of the time the stamp was originally applied, to reflect the original user and date/time the stamp was applied.
o Last modified on/Last modified by: indicates the date and time that the stamp was changed, as well as the user who made the change.
· Format:
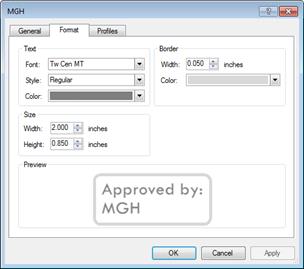
o Text: Font, style, and color may be adjusted.
o Size: The default width and height of the stamp may be set in inches.
§ The stamp may be manually resized/adjusted once applied on the annotation screen.
o Border: the border width in inches and color may be specified.
o Preview: The bottom of the tab shows what the stamp will look like based on the adjustments being made. Text shown here will adjust based on what is input in the General tab.
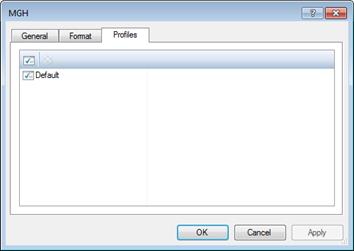
· Profiles: Use this option to give particular profile(s) access to a particular stamp.
A new functionality has been added which enables the user to take a .pdf from the attachments area of an order or from a location on their computer and then merge it into the Selected ReadyDocs area of the Documents tab. The user can then print the item as part of a closing or title package; this is useful when the user needs to print items specific to one closing that wouldn’t be useful in the document tree or the attachments grid. 265850
The user can now:
· Add a .pdf to the end of a group of ReadyDocs without having to print separately from the Attachments grid.
· Print a .pdf located on their computer without having to add it to the ReadyDoc tree.
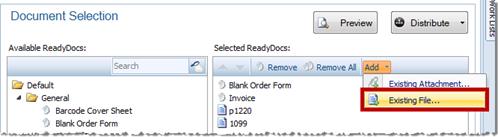
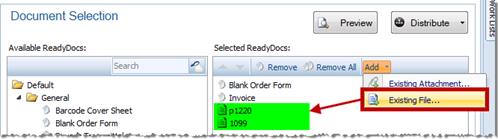
On the Selected ReadyDocs panel, there is a new Add button on the toolbar:
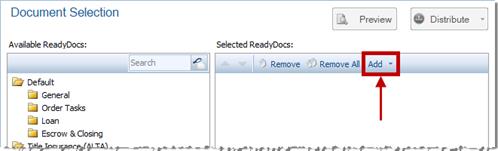
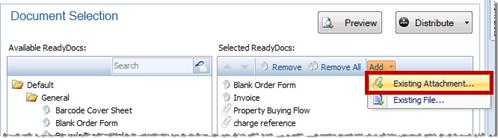
The dropdown contains the existing attachment and existing file options
· Selecting the Existing Attachment option will display the Open Attachment dialog:
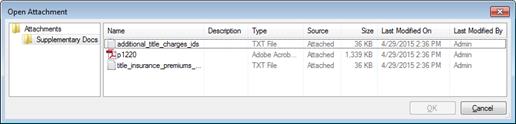
o Only one document can be selected at a time.
o The user may attach any .pdf located in the Attachments folder or any subfolders.
· Selected documents will appear at the end of the documents list in the Selected ReadyDocs panel:

o The paperclip icon indicates that the item was merged and not taken from the ReadyDocs tree.
o Documents may be removed from the panel by using the Remove or Remove All buttons.
o The user may preview a merged .pdf as any other document.
o There is no hotspot option available with documents added this way.
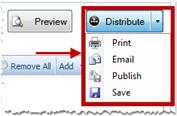
o Merge documents may be printed, emailed, published, and saved as .pdfs with the options that are available via the black arrow on the Distribute button:
· Selecting the Existing File option will display the Select Document dialog, allowing the user to browse to a location on their computer to find a document :
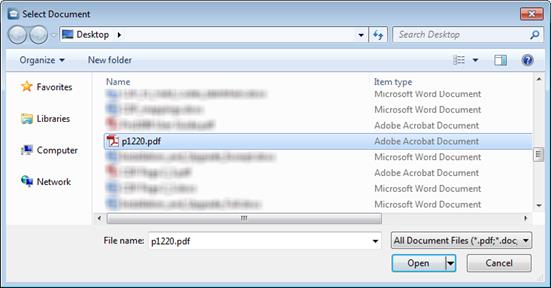
o Multiple documents can be selected/added at a time.
· Documents will appear at the end of the documents list in the Selected ReadyDocs panel:
o The paper icon indicates that the item was merged and not taken from the ReadyDocs tree.
o Documents may be removed from the panel by using the Remove or Remove All buttons.
o The user may preview a merged .pdf as any other document.
o There is no hotspot option available with documents added this way.
o Merge documents may be printed, emailed, published, and saved as .pdfs with the options that are available via the black arrow on the Distribute button:
A feature has been added that allows one user (“USER B”) to request access to an order that is open on another user’s (“USER A”) machine. If given access, USER B may then open the order on their machine. A permission has been added to SPAdmin which, if granted to USER B, would allow USER B to forcibly close an open order on USER A’s system. 255639
This feature provides the following functionality:
· IF USER B requests access to USER A’s open order:
o USER A may accept or deny the request from USER B to close the order.
o USER B will receive notification that a request to open an order has been denied or accepted, and the order will open.
· USER B may force USER A’s order to close and open it on their system, but only if USER B has the necessary permission in place.
o USER A will receive notification that USER B has forcibly closed their order; unsaved changes will be lost.
A permission must be granted to give a user the force order closure option:
· SPAdmin > Security > Permissions > ProForm > Order > Force Order Closure:
o If this permission is granted, a user may force close another user’s order. If not granted, the user will need to be granted permission from another user to open their order. This permission isn’t given to any group or user by default.
Requesting access to an open order
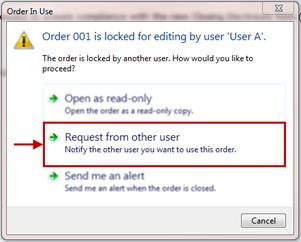
If USER B attempts to open an order that USER A has open, USER A will receive the Order in Use dialog. This dialog now contains a Request from other user option:
· Open as read-only is the default. When opened in this state, all fields are disabled & the order can’t be saved.
· Request from other user will open the Requesting Order dialog:
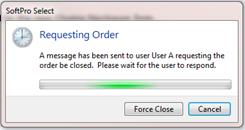
o This dialog remains open on USER B’s screen while the request is being made of USER A.
§ If USER B is granted the permission, he may force close the order.
§ If USER B isn’t granted the Force Order Closure permission, the Force Close button won’t be enabled.
o The dialog will stay until USER A accepts or rejects the request OR until USER B force closes the order or cancels the request.
o At the same time, USER A will be presented with the Order Close Request dialog:
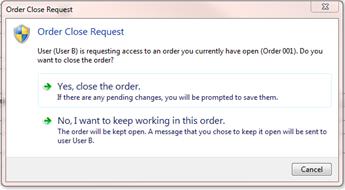
§ USER A may accept or deny the request to close the order.
· Send me an alert will send an email message that the order is available to the user if the user’s account has an associated email address and the SMTP settings are configured correctly.
If USER B sends a request to USER A, USER A will receive the following dialog:
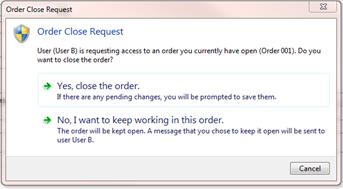
· If USER A selects Yes, the order will be closed on his machine and then automatically opened on USER B’s machine. USER A will be prompted to save if changes have been made.
· If USER A selects No, the order will remain open and a denial will be sent to USER B.
· If USER A doesn’t respond in a timely manner and USER B is granted rights to the Force Order Closure permission, then the Force Close button will be enabled; clicking Force Close will pull up a confirmation dialog:
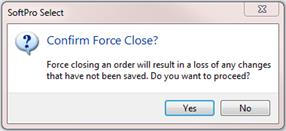
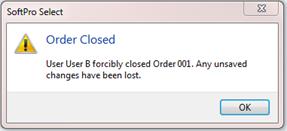
o If USER B clicks Yes, then the order will be closed on USER A’s machine, all of USER A’s unsaved changes will be lost, and USER A will also receive a notification that the order was closed:
o If USER B clicks No, then they will be moved back to the Requesting Order dialog.
· Clicking the Force Close button will close the order for USER A and simultaneously open it for USER B.
o The short cut for the Force Close button is Alt+Shift+F.
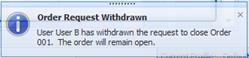
o Cancel withdraws the Order Close Request & send a message to USER A that the request was cancelled. This appears in the lower right of the screen:
Denying an Order Close Request
IF USER A denies USER B’s request to close their order, USER B will receive a Cannot Open Order message:
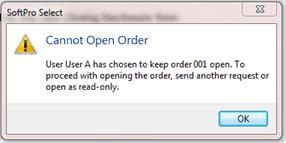
· USER B can now send another request, open as read-only, or have an alert sent when the order is available.
Functionality has been added to help detect & troubleshoot memory leaks. This will help users—particularly system admins or other tech staff—capture memory errors and send to SoftPro Research & Development for assessment and troubleshooting. 250896
· The tool is very easy to run and produces a simple output that can be emailed.
· The tool can be turned on and off as needed; it defaults to off.
· The tool should only be turned on when a memory leak is suspected; it can slow application performance.
· Running the Tool:
o To turn on the memory leak identification tool:
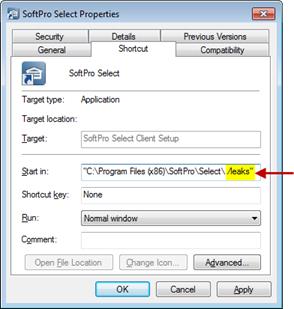
§ Run the application from the command line with /leaks specified as a start-up parameter, or
§ Create a new shortcut to the client using the /leaks parameter
o Once the application is started with this setting, nothing else is required. The user should work normally.
o If a memory leak is detected, the user will see a message:
§ Potential memory leak detected!
A possible memory leak has been detected. In order to aid in diagnosing and resolving this issue, we’d like to capture a memory snapshot at this time. There is a small potential that this can cause the application to terminate abnormally. Do you want to capture the memory leak now?
[Yes] [No]
- Yes will be the default option.
§ If the user selects No, the application will allow them to continue working.
§ If the user selects Yes, a message will appear while the snapshot is being captured:
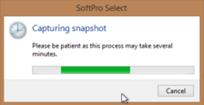
§ The user will not be able to take any action within the application while the snapshot is being captured.
o When the process completes, a message will advise that the snapshot files are located on the user’s desktop.
§ A .zip file will be created automatically and is named with the current date/time:
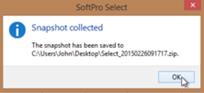
§ The .zip file contains a text log file and memory dump file that identify the objects being leaked.
o After the memory snapshot is complete, the user should:
§ Email the .zip file to support@softprocorp.com at SoftPro Research & Development.
§ Close the application and restart without the /leaks start-up parameter so that the user can continue working normally while SoftPro investigates.
· A Suppress Cascading option has been added to all lookup tables. Example use: Suppress Cascade on the Lender lookup table for the City and Zip columns so that selecting a lender will not trigger the City or Zip lookup, which could result in a prompt to the user. 115773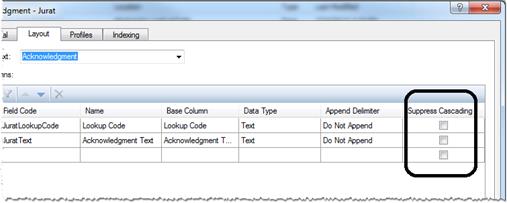
o The column labeled "Suppress Cascading" contains boxes that are unchecked by default.
o If checked, and a user attempts to retrieve data from a lookup table containing this field, all the data will be retrieved from the table, BUT it will not trigger a cascade lookup if any column in this table is a key field in another table.
· An object reference error was occurring when saving changes to lookup tables: “QueryStatus call for command failed - Object reference not set to an instance of an object;” resolved. 236377
· “Out of Memory Errors" were occurring in certain situations; resolved. 247622
· Commissions (700): An unhandled exception “Member 'HUD701Charge.CommissionAmount' not found” was occurring when using F8 in a commission field for 701/702; fixed. 244444
· A performance improvement was made for formula execution. 261696
· A database migration error was occurring in some upgrade environments; fixed. 265647
· Custom field labels were missing for some endorsement custom fields; resolved. 210949
· Timeout errors occurring when printing checks and running reports have been resolved. 244886
· CTRL+A (select all) wasn’t working on any of the Rich-Text Formatting (RTF) text boxes; fixed. 248926
· Three ALTA documents effective 04-02-15 have been added to ReadyDocs as well as the endorsement lookup table: 266686
o Endorsement 28.3-06: (Encroachments - Boundaries and Easements - Described Improvements and Land Under Development).
o Endorsement 19.2-06: (Contiguity - Specified Parcels).
o Endorsement 9.6.1-06: (Private Rights - Current Assessments - Loan Policy).
· PDF output resolution has been modified to decrease file size when PDFs are generated. 266105
· Developers working on Select shell integrations found that the IWindowManager service was returning a null value when trying to determine the active order from the Documents tab; resolved. 255686
· Users were not able to copy/paste from a PDF generated when emailing a ReadyDoc; fixed. 254544
· Emails with attached documents were being blocked by outside parties because the attachment was showing as having two extensions (ex: “MyDocument.Order.pdf”); resolved. 245222
· When printing invoices, the invoice description has been updated to include the total invoice amount so it is easier to select the correct invoice from the list. 265374
· Attachments:
o It was possible for data corruption to occur if a user saved an order containing a newly-attached document at the same time that an archiving job was running; fixed. 265355
o IF statements comparing two date time fields with the same date and time entry were returning a FALSE unless a formatter is used; resolved. 261796
o Shortcut keys have been made available when the user is in the Selected ReadyDocs area, 254211
§ Alt+D: access to the Distribution Screen
§ Ctrl+P: Print
§ Ctrl+U: Publish
§ Ctrl+E: Email
§ Ctrl+S: to Save
· Templates with fees sent from title screens were not being applied properly to CDF orders; fixed. 268375, 262806, 268129
· An Unable to fully complete overlay of order error was occurring when a seller with a social security number was being overlaid and the user does not have permission to the SSN field; fixed. 248295
· A 1099 record cannot be created or updated upon order save if the seller contact has a social security number and the user’s permissions do not permit viewing a social security number; resolved. 180041
· Certain 1099 records were not showing seller names correctly after upgrade; resolved. 261338
· The Pro1099 Seller record was not updating properly when the seller information changed in ProForm multiple times; resolved. 256982
· The server was not recovering as expected from invalid sessions after a database timeout; fixed. 266603
· Archiving jobs were failing when encountering a corrupt file stream; resolved. 283456
· Rate Tables were not displaying in alphabetical order in the Policy Manager under the Owner's Policy, Loan Policy, and Prior Policy; resolved. 106797
· Performance enhancements were made for loading rate tables, recording fees, and transfer taxes. 261697
· Performance enhancements were made to the process of assigning profiles to ReadyDoc trees. 248940
· An error was occurring when installing license files if the preexisting license keys had expired; resolved. 147190
· The Payor code and Apply towards grid were not being enabled as expected for posted receipts, cleared or uncleared. These are now available as long as the appropriate permissions are applied; resolved. 268523
· Adjustments were not being created correctly when changing amounts while simultaneously voiding or reposting; this was altering the Single Ledger Balance Report; resolved. 245211
· Check numbers were not printing in check number order; fixed. 85605
· The Disburse Transferred Funds screen wasn’t displaying the "Auto-print transaction form" option; fixed. 248652